I am really excited about presenting a session in the East County (San Diego) TechFest. The TechFest will be held at West Hills High School, and I will be presenting a session on Enhancing Student Projects Through Digital Photography. Here is my presentation in PDF form. Just click on the picture to download the file.
During my presentation, I will share a video that my son created. I love this video because he uses so many of the basic skills that I will talk about in my presentation, such as the rule of thirds, getting close to your subject, leading lines, fill the frame, shoot from different angles and levels, and tell a story with your pictures. I hope you enjoy the video as much as I did. (Get your Kleenex ready!)
Fritz is born from Tyler Little on Vimeo.
During the presentation, I will share different ways to share your student's images. One thing you can do is have your students create a ThingLink. After doing on a Photowalk where students looked for examples of texture, we put together a ThingLink with lots of links that take you to images taken by the students.
Another way students can share their projects is to create a collaborative video. Students could gather all of their pictures after a field trip to create a video in iMovie, Animoto, or Flipagram. Flipagram is what I used to created a video highlighting many cloud pictures that I have taken, as well as pictures that elementary students took during a PhotoWalk. I love the Flipagram app! It is so easy to use. Here is my "Cloudy" video.
Showing posts with label Resources. Show all posts
Saturday, February 7, 2015
Monday, December 1, 2014
Symbaloo
Do you love Symbaloo as much as I do? Personally I don't think I could survive without it! Symbaloo is a great tool for keeping all of your favorite weblinks organized. By going to Symbaloo.com you can create a free account. No matter which computer or device you are on, you can get to all your great websites just by logging in to Symbaloo.
Another great reason to use Symbaloo is that you can find web resources already created by others, such as this one with lots of December ideas to use in your classroom. This one was made by Team Symbaloo, and I love it!
You can create web mixes that are for you personally, or you can make them Public to share with other Symbaloo users. For example, here is one on QR Codes that I created and made public.
I also have a public Common Core Webmix. If any of the titles sound interesting to you, just click on them and it will take you right to a new website that will open in a new window.
You can add a Symbaloo Bookmarlet onto your web browser, so that anytime you are on a site that you'd like to add to a Symbaloo web mix, you just click the symbol, then tell which web mix you would like to add it to. Add the Symbaloo Bookmarker.
Hope you enjoy Symbaloo as much as I do!
Another great reason to use Symbaloo is that you can find web resources already created by others, such as this one with lots of December ideas to use in your classroom. This one was made by Team Symbaloo, and I love it!
You can create web mixes that are for you personally, or you can make them Public to share with other Symbaloo users. For example, here is one on QR Codes that I created and made public.
I also have a public Common Core Webmix. If any of the titles sound interesting to you, just click on them and it will take you right to a new website that will open in a new window.
You can add a Symbaloo Bookmarlet onto your web browser, so that anytime you are on a site that you'd like to add to a Symbaloo web mix, you just click the symbol, then tell which web mix you would like to add it to. Add the Symbaloo Bookmarker.
Hope you enjoy Symbaloo as much as I do!
Thursday, May 9, 2013
Creating QR Codes with Just One Click
Do you want to know a quick and easy way ever to create QR codes? By going to this website you will see just how easy it is. Just click on the QR Coder and drag the button onto the Bookmarks Toolbar on your browser. When you click the button it will create a QR code of the page you're visiting. Then just copy the QR Code and paste it wherever you want it to go. Voila! You can even highlight text on a page and the button will then create a QR code based just on that text.
If you can't see your Bookmarks Toolbar, then go to your web browser such as Firefox or Safari, click on Bookmarks, then Bookmarks Toolbar. (In Safari it is called the Bookmarks Bar).
Here is what my Bookmarks Toolbar looks like:
Tuesday, April 30, 2013
A Technology Blog Hop
Spring into Technology with Classroom Freebies!
Several phenomenal teachers, Technology Tailgate Coaches and bloggers are joining forces for an amazing classroom technology blog hop! As you hop from blog to blog, you will visit some of your favorite blogs and discover a few new blogs too! Each with a fabulous freebie just for you!
Thank you for hopping over!
Speaking of blogs, have you started a class blog? Do you need some ideas to get you started, or keep you motivated? Here are some posters to help encourage your students to make appropriate comments on class blogs. I also have gathered some favorite QR Codes that can be put up in your classroom. For the experienced class bloggers, have you seen Linda Yollis' class blog and her Wikipedia site on class blogs? Here are some amazing free blogging resources for you to download. Just click on the picture below to download.
Thank you so much for stopping by and visiting! If you are new to my blog and liked what you see, don't forget to follow me! The next stop on the path is
Melanie at I Luv Twek
In case you didn't start from the beginning, here is an ordered list of all participating blogs!
Kate from EduKate and Inspire
Kristin from iTeach 1:1
Heidi from Rakis Rad Resources
Leah from Learn With Leah
Amanda and Aylin from Learning to the Core
Nikki from An Uncommon to the Core Teacher
Karla at The Connected Teacher
Shana at Enchanted with Technology
Kristin at Teacher Playground
Jen at Tech with Jen
Kay at A Little Tech
Melanie at I Luv Twek
Carrie and Caitlin at Table Talk with C & C
Lauren at iWonder
Jan at The Science Vault
A special thank you to Jen at Tech with Jen for designing the blog hop button!
Interested in joining our next blog hop? Join here!
Monday, April 29, 2013
Interactive Sites for Education
Today I stumbled upon a great find - Interactive Sites for Education. If you are a K-5 teacher and haven't checked this site out yet, then today is your lucky day! Karen Ogen, a technology integration specialist from Columbia, South Carolina, has put together the best K-5 online interactive educational games and simulations. There are activities and games for almost every curricular area. They could be played whole group on an interactive whiteboard, or in a small group, individually at the computer, or at home to reinforce concepts. You will love this site, and so will your students!
Friday, April 12, 2013
A New Reason for Student Blogs
I love blogging. But my eyes were opened when I recently attended the CUE Conference in Palm Springs. In the very last session of the conference I could hardly contain my excitement when I heard how Dawn-Monique Elkin uses a class blog for a rich Common Core Reader's Workshop Character unit. Whether you have a class set of iPads or just a few computers, students can use blogs to extend the comprehension, increase engagement, motivation, and collaboration.
Students in Mrs. Elkin's 3rd grade use the blog to respond to her posts, and digitally communicate with their peers. By doing so they deepen their exploration and understanding of various texts and strengthen their overall reading skills. http://kidblog.org/ElkinEagles
There are many places to create a blog - Blogger, Wordpress, and Kidblog are a few to start with. For my class blog, I use Kidblog. It is free, easy to set up, and the students have no problem learning how to use it. That is the site that Mrs. Elkin uses as well. For those with iPads and iPods, there is an app for Kidblog that can be downloaded at the Apple App Store.
If you would like help setting up your class blog, here are a few tips for using Kidblog. First of all, you will need to set up your classroom account. Go to the Kidblog homepage, and select Create a Class!
The following pictures will show you how I set up my class blog. You may want your settings to be different, so make it work for you. Give your blog a title then choose your theme from the list of themes. Keep the URL short, and something the students will remember. You might want to have a QR code for easy navigation to the site. I didn't use the class signup code. I just added each student myself to get them all set up. Put in your timezone by selecting a city near you.
I am excited to use blogs with my Universal Access (UA) group in Language Arts. I know they will do a great job responding to literature while collaborating and communicating with each other. Do you have a class blog? How do you use it?
Students in Mrs. Elkin's 3rd grade use the blog to respond to her posts, and digitally communicate with their peers. By doing so they deepen their exploration and understanding of various texts and strengthen their overall reading skills. http://kidblog.org/ElkinEagles
There are many places to create a blog - Blogger, Wordpress, and Kidblog are a few to start with. For my class blog, I use Kidblog. It is free, easy to set up, and the students have no problem learning how to use it. That is the site that Mrs. Elkin uses as well. For those with iPads and iPods, there is an app for Kidblog that can be downloaded at the Apple App Store.
If you would like help setting up your class blog, here are a few tips for using Kidblog. First of all, you will need to set up your classroom account. Go to the Kidblog homepage, and select Create a Class!
The following pictures will show you how I set up my class blog. You may want your settings to be different, so make it work for you. Give your blog a title then choose your theme from the list of themes. Keep the URL short, and something the students will remember. You might want to have a QR code for easy navigation to the site. I didn't use the class signup code. I just added each student myself to get them all set up. Put in your timezone by selecting a city near you.
![]() |
| I had my students draw a picture of their face to use for their avatar. I would never put a student's picture with their name on the Internet. |
Tuesday, February 12, 2013
Fun with Google Forms
Have you used Google Forms in your classroom? I think Google Forms is a powerful resource that is often overlooked. If you haven't used it, or need a little refresher course on how to use it, then keep reading!
Google Forms can be connected to a Google spreadsheet. Responses are automatically sent to the spreadsheet. Google Forms are a simple and useful tool for sending surveys, giving a quiz, or for getting information, or planning an event. In fact, there are so many uses for Google Forms in the classroom. When my students were learning about graphs in math, my teaching partner sent out the following form to all the teachers at our school. Students looked at the data that came in and used tally marks to count the results.
After counting their tally marks, students each made a pictograph using the Smart Notebook app on their iPads. (Our kids were also learning about Neighborhoods, so we incorporated that in the 2nd question.)
Here are some other ideas for using Google Forms in meaningful and authentic ways in class:
Here is a link to the Book Review form I made for my students to fill out after they read their story. Here is an example of a spreadsheet that is attached to the form:
Still looking for some other ideas? How about these?
So, are you ready to try it out? Here is how it works. Just a word of warning though, if you are trying to create a Google Form on an iPad, you need to use the Desktop Version and not the Mobile.
I love how you can choose different themes for your form.
These are the different types of questions you can use in your Google Form:
When you are ready to share your form, you have several options available. I always like to email it to myself so I can easily find the link to where it is online. But my favorite way to share it with my students is with a QR code. It is really easy to create a QR code that can be scanned by your students. To create one, just go to Google and search for "QR Code Generator." Once you do that, you will see lots of options. I usually use this one. All you need to know is the URL of your form. Just go to your online form and copy the URL. Paste the URL onto the QR Code generator, and it will automatically create the QR code for you. Just copy the QR code and paste it into a document that the kids can scan.
On our iPads we have a free app called Qrafter. I'm sure there are lots of other ones out there, but I've had lots of success with this one. At the end of your class or workshop, why not have your students fill out a form telling what the most valuable thing is that they learned that day, and what they would like to learn about in the future?
Please share how you have used Google Forms in your classroom!
Google Forms can be connected to a Google spreadsheet. Responses are automatically sent to the spreadsheet. Google Forms are a simple and useful tool for sending surveys, giving a quiz, or for getting information, or planning an event. In fact, there are so many uses for Google Forms in the classroom. When my students were learning about graphs in math, my teaching partner sent out the following form to all the teachers at our school. Students looked at the data that came in and used tally marks to count the results.
After counting their tally marks, students each made a pictograph using the Smart Notebook app on their iPads. (Our kids were also learning about Neighborhoods, so we incorporated that in the 2nd question.)
Here are some other ideas for using Google Forms in meaningful and authentic ways in class:
Here is a link to the Book Review form I made for my students to fill out after they read their story. Here is an example of a spreadsheet that is attached to the form:
Still looking for some other ideas? How about these?
So, are you ready to try it out? Here is how it works. Just a word of warning though, if you are trying to create a Google Form on an iPad, you need to use the Desktop Version and not the Mobile.
I love how you can choose different themes for your form.
These are the different types of questions you can use in your Google Form:
When you are ready to share your form, you have several options available. I always like to email it to myself so I can easily find the link to where it is online. But my favorite way to share it with my students is with a QR code. It is really easy to create a QR code that can be scanned by your students. To create one, just go to Google and search for "QR Code Generator." Once you do that, you will see lots of options. I usually use this one. All you need to know is the URL of your form. Just go to your online form and copy the URL. Paste the URL onto the QR Code generator, and it will automatically create the QR code for you. Just copy the QR code and paste it into a document that the kids can scan.
On our iPads we have a free app called Qrafter. I'm sure there are lots of other ones out there, but I've had lots of success with this one. At the end of your class or workshop, why not have your students fill out a form telling what the most valuable thing is that they learned that day, and what they would like to learn about in the future?
Please share how you have used Google Forms in your classroom!
Friday, February 1, 2013
Smilebox Makes Me Smile
Last night when I saw Reagan's post on Tungstall's Teaching Tidbits with a slideshow that was created in Smilebox I just knew I had to check it out. So today, after a field trip to the Lakeside Women's Club Art Show I edited a few photos and make my first Smilebox slideshow! Thank you Reagan for the great idea! It is free to join, however if you want to be able to play your slide show full screen with no ads, with way more templates and music choices, then you can sign up for a free 7 day trial. (Of course, I did have to put in my credit card info, but believe me, once my free 7 days is up I will be happy to pay a yearly amount to be able to create such quick and easy slide shows with fun templates and cool music.) Can you tell I am excited?!! So, check out my first Smilebox slideshow!
The art we created for the show was made with cardboard, tacky glue, aluminum foil, Q-tips, and shoe polish. It is one of my favorite art projects in the whole world. You can learn more about it on a link found on my Pinterest page.
Have you tried Smilebox? How have you used it in your classroom?
![]() |
| This free picture slideshow generated with Smilebox |
The art we created for the show was made with cardboard, tacky glue, aluminum foil, Q-tips, and shoe polish. It is one of my favorite art projects in the whole world. You can learn more about it on a link found on my Pinterest page.
Have you tried Smilebox? How have you used it in your classroom?
Thursday, January 10, 2013
I Love the Book Creator App!
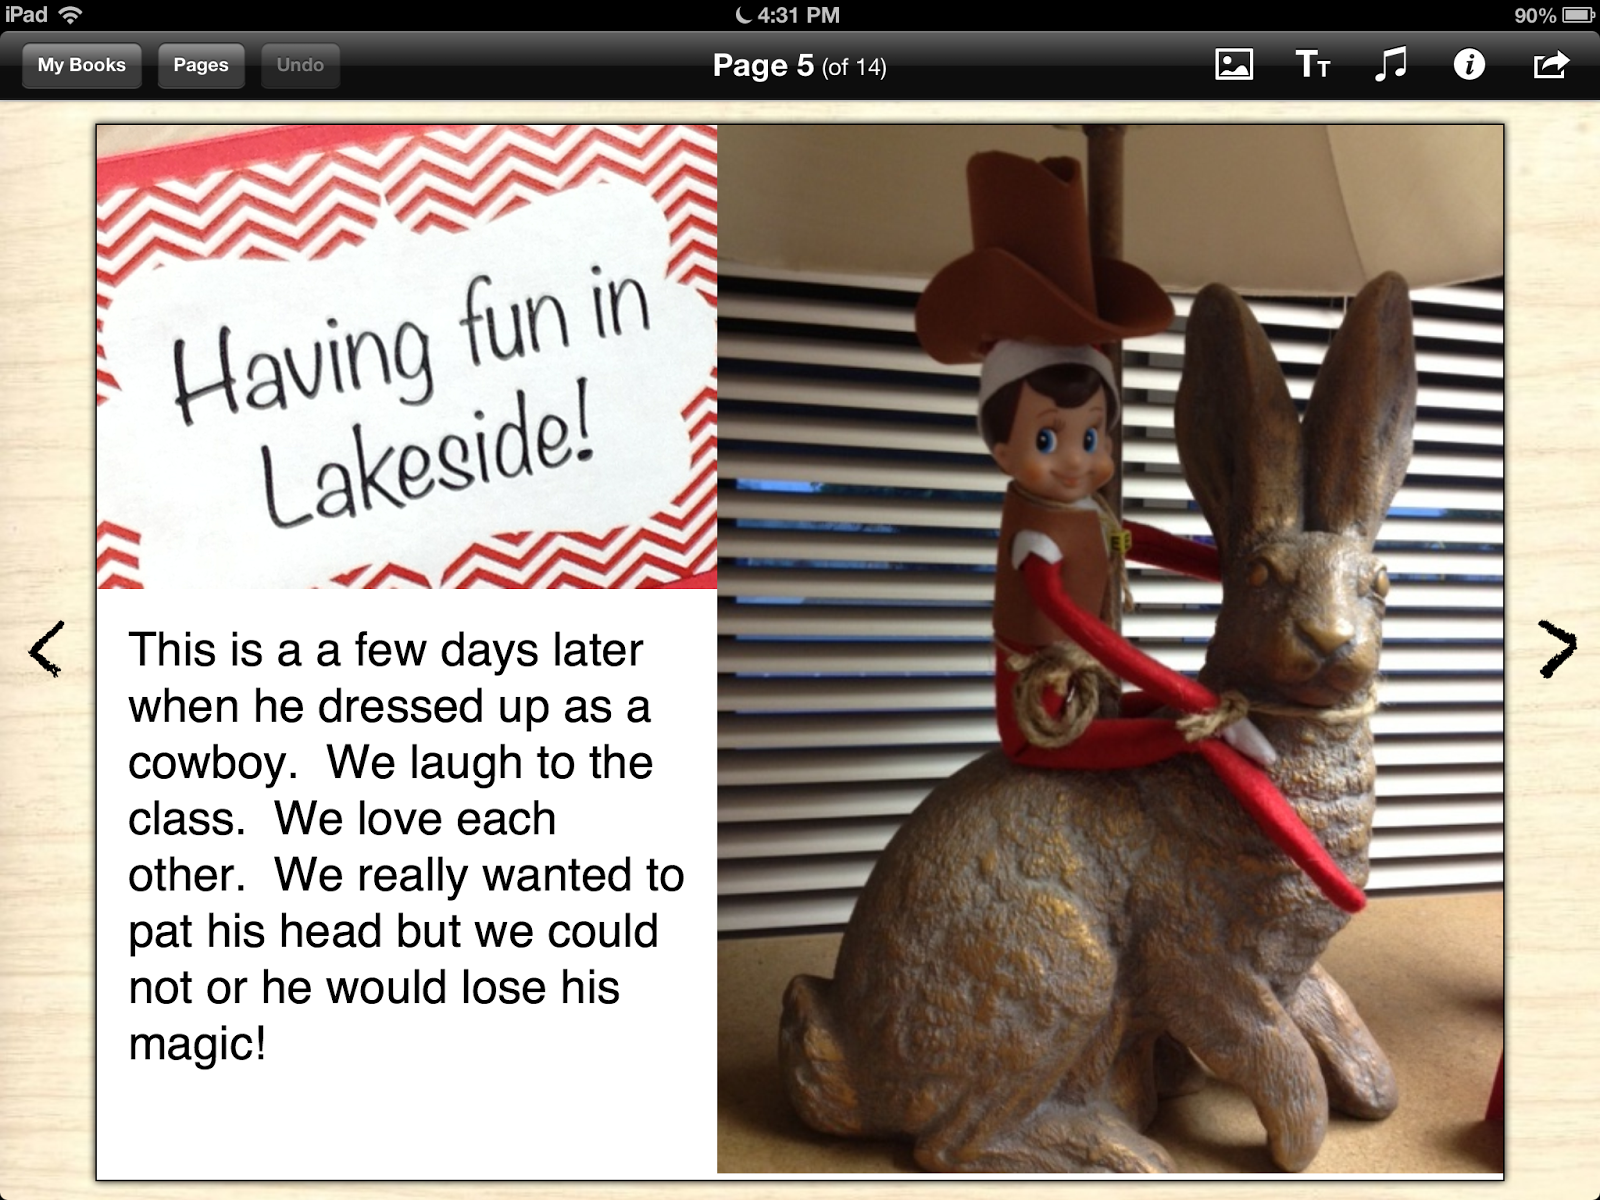
Have you tried the Book Creator app for motivating your students to write? I used it last December for students to document our "Elf Adventures" in the classroom, and saw incredible motivation to write from each of my students! (Whether it was the elf, or the app I do not know, but the two of them together was amazing!) Book Creator provides a simple way to create beautiful books on your iPad. Students can even record their voice reading, or add videos.
After students create their book, they send it to iBooks. The teacher can sync the books with the classroom set of iBooks for the rest of the class to read. How powerful is that?!! Students will see their book on the bookshelf with other great books!!! You can even email the book as a PDF which can be viewed on a computer or personal device, or an ePub book, to be viewed on an iPhone or iPad. (Just a warning though...If the book has lots of pages with pictures and audio, it might be too large to email. In that case you can just save it to your Dropbox.)
Here is a link to a short video that pretty much shows you (in less than two minutes) how the app works.
http://vimeo.com/redjumper/bookcreator
There is help available on the app itself, and it is super easy for the kids to use. To get support, just go to the "My Books" section on Book Creator, and click on Support. There are answers to any question you could possibly have.
My 2nd and 3rd graders started using it without any instruction from me. I actually let them go in and explore the different book creator apps that were loaded on their iPads, and they found that Book Creator was the easiest to use, plus the books they created looked really good. The app isn't free. It costs 4.99 in the app store, but it is well worth the cost.
Here are some screen shots from one of my student's books. I wish you could hear the expression in her voice as she reads! It is priceless! Be sure to scroll down to the bottom where I have included some ideas on how to use this powerful app in the classroom!
There are many ways to use Book Creator in the classroom. Here are a few suggestions:
- Students could create their own textbooks, collaborating as each student contributes a chapter/topic/or theme.
- Students could publish an essay or poetry anthology.
- Older students could create books for younger students.
- Connect curricular subjects with art. Have students create the art for their books, such as the illustrations for books on the life cycle of the butterfly, or animal reports.
- Teachers could create a short book with pictures to introduce a new topic to students, or to activate prior knowledge.
Friday, December 28, 2012
Student Check Off Forms
Are you looking for a way to see who hasn't turned in that paper that was due to the office last Friday? Or who still needs to turn in their field trip permission slip? Well look no further! I just created a Student Check Off Form that I can't wait to use. It is a free download at the Teachers Pay Teachers site. You can check it out here: Student Check Off Forms

I am super excited because this is my first product at the Teachers Pay Teachers site. I have benefited so much from the things that other teachers have created, and now it is my turn to start giving back. I hope this will be the first of many things that I can share. If you are in need of a new check off form, please download it and don't forget to give me a rating. :-) There are more exciting projects in the works!
One of the best Christmas gifts I received from a colleague this year was a gift certificate to be used at Teacherspayteachers.com. I didn't even know you could do that! So if you are need of a gift for a teacher friend, don't forget this great resource. They will love you for it!

I am super excited because this is my first product at the Teachers Pay Teachers site. I have benefited so much from the things that other teachers have created, and now it is my turn to start giving back. I hope this will be the first of many things that I can share. If you are in need of a new check off form, please download it and don't forget to give me a rating. :-) There are more exciting projects in the works!
One of the best Christmas gifts I received from a colleague this year was a gift certificate to be used at Teacherspayteachers.com. I didn't even know you could do that! So if you are need of a gift for a teacher friend, don't forget this great resource. They will love you for it!
Tuesday, December 4, 2012
The Elf Has Arrived!
The kids set off (with my permission of course) to find that book and letter! Lucky for me, I just so happened to bring my GO PRO camera in that morning, and had it recording as the kids walked in the room! I was able to catch all of the excitement! This will be GREAT for our end of the year DVD with classroom happenings throughout the year!
Students took pictures of the elf, and got some good practice editing their pictures on their iPad. (Each student in my 2nd and 3rd combo class has an iPad.)
The next day students found the elf in a tree that was decorated by the elf with this note:
The next thing we needed to do was decide on a name for our elf. Since students already had brainstormed some possible names the day before, they were ready to write their favorite name on a big piece of chart paper. Next, I went to Google Drive and created a "form." If you haven't created a form yet you've got to try it out! This was my first Google form to ever create, and it was super easy! Just go to your Google docs, click on New File, and select a form. I chose a multiple choice format, and a cute holiday theme. (So easy, and it looks so professional!)
When I created my form, I didn't realize I could go in and change the font where it says Sample Question 2. I finally figured out that you could have the people you send it to write their name there, so you can see who submitted which elf name. (Great to do in case any of your students voted twice - which mine did!) Besides emailing the form to each of my students, it is fun to email friends, my husband, the principal, school secretary, and teacher buddies to participate in the vote too. It puts a smile on their face for sure!
Well, it looks like Elfis is the name of our elf, so I am off to find a little guitar ornament that Elfis can hold tomorrow. Stay tuned for more pictures of our new class elf! My friend Sandy who teaches next door had a girl elf show up in her classroom on the same day as our elf arrived. (Can you believe that?!!) We have had a blast running back and forth between each other's classrooms checking out what the elves are up to.
If you are thinking about having an "Elf on a Shelf" in your classroom, here are some great resources you might want to check out!
![]() | |||
| Elf on a Shelf Ideas on Pinterest |
Elf on a Classroom Shelf By EduKate and Inspire
I LOVE this resource! I used it to make journals for each student to record the elf adventures in our classroom. I have never seen my students so motivated to write each morning!
I am excited to link up with the Technology Tailgate Blog on this Techie Tuesday Link Up day. Check it out for lots of great resources.
Subscribe to:
Posts (Atom)